
Getting Started with Amazon SES Accounts
Amazon SES Account
If you’re searching for a reliable and cost-powerful way to send email messages, Amazon SES (Simple Email Service) may be the perfect solution in your wishes. With Amazon SES, you may send bulk e-mail messages to your customers, subscribers, or clients, and make sure of high deliverability prices without being annoyed about coping with e-mail servers or infrastructure. In this blog post, we are able to guide you thru the steps to create an Amazon SES account and start sending emails.
Step 1: Create an Amazon Web Services (AWS) Account
Before you can use Amazon SES, you want to create an AWS account. If you have already got an AWS account, you may skip this step. If no longer, go to the AWS internet site and click on the “Create an AWS Account” button. Follow the on-display screen commands to create your account.
Step 2: Verify Your Email Address
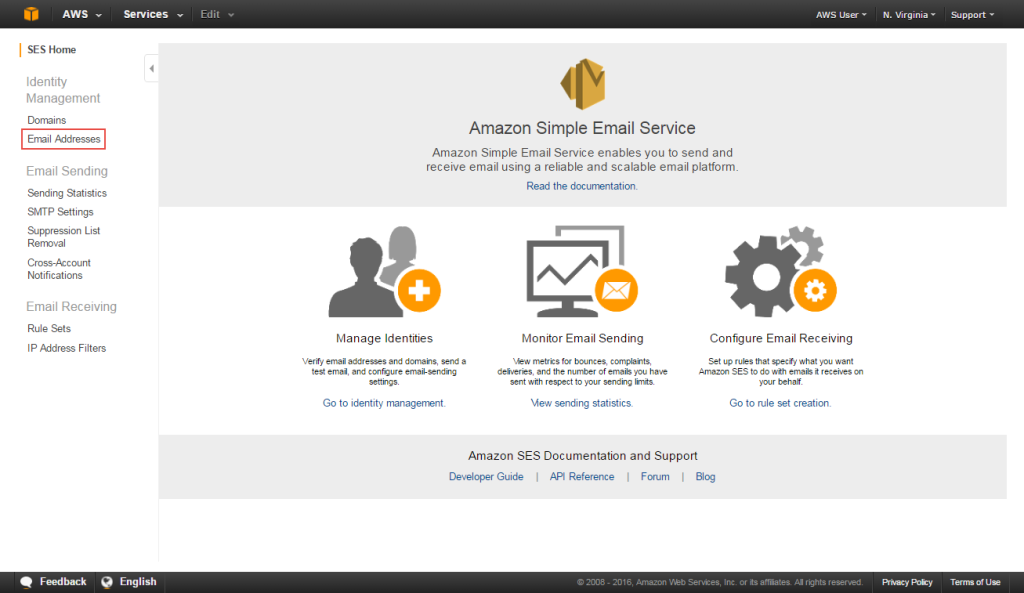
To send emails with Amazon SES, you want to affirm the email addresses you want to use. This guarantees that you personalize the e-mail address and stops others from the use of it to send spam or phishing emails. To confirm your e-mail copy, visit the Amazon SES console and click the “Email Addresses” hyperlink. Click the “Verify a New Email Address” button and observe the commands to confirm your electronic mail cope.
Step three: Create SMTP Credentials
To ship emails using Amazon SES, you need to apply SMTP (Simple Mail Transfer Protocol) credentials. These credentials encompass a username and password that you use to authenticate with the Amazon SES SMTP endpoint. To create SMTP credentials, go to the Amazon SES console and click on the “SMTP Settings” hyperlink. Click the “Create My SMTP Credentials” button and follow the commands to create your credentials.
Step four: Configure Your Email Client
Once you have your SMTP credentials, you could configure your email consumer to apply Amazon SES to ship e-mail messages. The technique for configuring your electronic mail client will range depending at the client you are using. However, the fundamental steps are as follows:
- Open your electronic mail consumer and visit the settings or choices menu.
- Find the “Outgoing Mail Server” or “SMTP Server” settings and input the Amazon SES SMTP endpoint: SMTP.[region].Amazonaws.Com (update [region] with the AWS region you are the use of, such as us-east-1).
- Enter your SMTP username and password (the credentials you created in Step 3).
- Save your changes and ship a test e-mail to confirm that your e-mail customer is configured successfully.
Conclusion
Amazon SES is a powerful and easy-to-use electronic mail carrier that will let you ship email messages reliably and price-efficiently. By following the steps mentioned in this blog put up, you may create an Amazon SES account, verify your e-mail address, create SMTP credentials, and configure your e-mail purchaser to start sending e-mail messages. With Amazon SES, you may focus on growing compelling content and let Amazon handle the email delivery infrastructure.
If you are searching for an easy and low-cost way to ship bulk emails, Amazon SES (Simple Email Service) is probably the solution you need. With Amazon SES, you could effortlessly ship emails to your subscribers, customers, or customers, without the trouble of dealing with your personal e-mail infrastructure. In this blog put up, we will guide you via the stairs to create an Amazon SES account and start sending emails in no time.
Firstly, you want to create an AWS account to apply for Amazon SES. If you already have one, you may pass directly to verify your e-mail cope. This step ensures which you personal email deal you want to apply for sending emails, stopping others from the usage of it for spamming or phishing. You can affirm your e-mail cope by way of going to the Amazon SES console and following the easy on-display instructions.
Next, you may want to create SMTP credentials to authenticate with the Amazon SES SMTP endpoint. These credentials include a username and password, which you can easily generate via following the commands inside the Amazon SES console.
Once you’ve got your SMTP credentials, you could configure your e-mail customer to use Amazon SES to ship emails. This might also range from relying to your e-mail client, but the simple steps encompass coming into the Amazon SES SMTP endpoint, your SMTP username and password, and checking out to verify the entirety is operating effectively.
In the end, Amazon SES is an extremely good choice for sending bulk emails with ease and cost-effectiveness. With the stairs mentioned on this blog post, you can create an Amazon SES account, affirm your e-mail deal, create SMTP credentials, and configure your email purchaser to start sending emails. You can then focus on crafting compelling content, even as Amazon handles the e-mail transport infrastructure.
Are you tired of struggling with e-mail shipping and handling your personal e-mail infrastructure? Look no further than Amazon SES (Simple Email Service)! With Amazon SES, you may ship bulk emails to your customers or subscribers without stressful approximately the technical details of e-mail delivery. In this blog publication, we will stroll you through the easy steps to create an Amazon SES account and begin sending emails very quickly.
First, you will want to create an AWS account if you don’t have already got one. Once you’re logged in, you could verify your e-mail deal to verify possession and prevent unsolicited mail or phishing. Verifying your e-mail cope is quick and smooth; just follow the stairs furnished inside the Amazon SES console.
Next, you will want to generate your SMTP credentials to authenticate with the Amazon SES SMTP endpoint. This step is likewise sincere, and you may create your credentials with only some clicks.
Finally, it’s time to configure your e-mail client to use Amazon SES to ship emails. Although the method may additionally vary relying on your e-mail client, the simple steps are simple and easy to observe. Just enter the Amazon SES SMTP endpoint, your SMTP username, and password, and you’re equipped to start sending emails!
In conclusion, Amazon SES is a tremendous choice for sending bulk emails reliably and cost-effectively. By following the steps outlined in this blog submission, you could create an Amazon SES account, affirm your e-mail deal, generate your SMTP credentials, and configure your e-mail consumer to start sending emails effortlessly. So why no longer deliver Amazon SES a try and free up it slow to recognition on creating tremendous content material?